No Ground Wire in Ceiling Light Fixture Junction Box: What to Do?
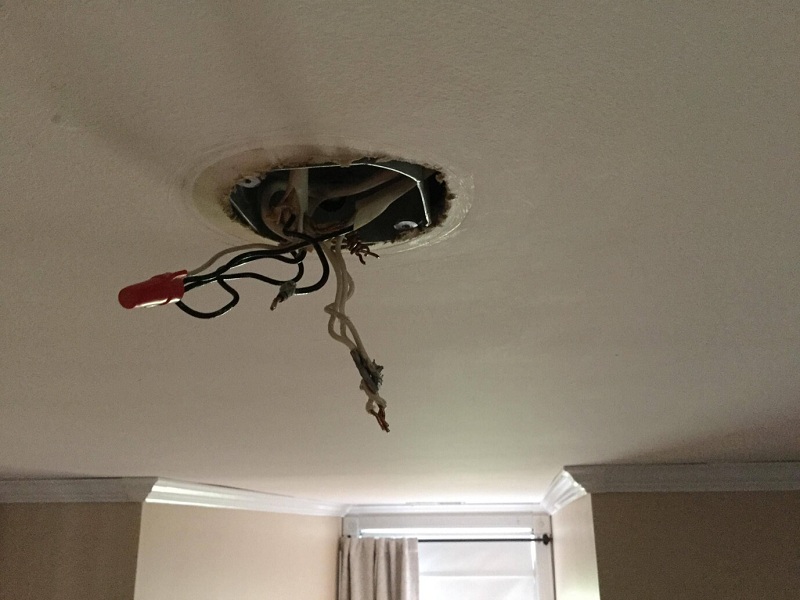
What if a bunch of ceiling lights you ordered arrive at your doorstep, and upon installing them, you realize there’s no ground wire!
As troubling as it sounds, it’s not going to afflict your light fixture or its efficiency entirely.
This can be resolved; in some cases, you might not even need it entirely.
What is a Ground Wire?

A ground wire is usually a bare wire or green wire in the fixture. It is designed for protective reasons, which is in the events of any short circuits or if a live wire breaks loose in a ceiling fixture, the ground wire signals the circuit breaker. It is, in simple terms, an extra layer of safety.
So if you figure out there’s no ground wire in your ceiling light fixture for some reason, behold the panic; there are a few things you can do:
- Examine the fixture
Check if the manufacturer has grounded the fixture in any other way instead of using an actual ground wire. At times, it has a metal box; it serves as grounding.
If the fixture has a plastic box, it has either a metal strip attached to it or have metal brackets for mounting.
In a few cases, there is a ground screw given with the fixture. - Locate the ground screw
Sometimes a ground screw is present, which is green in color. This can attach to any of the mounting holes present in the electrical box along with the wire from the supply. You can obtain a ground wire from a local shop and attach it with the electrical box with wire wrapped around the ground screw. - Locate the copper wires
The copper wire from the fixture and copper wire from the supply can be joined together with the ground screw.
Read more: How to Choose the Best GFCI Outlet?
How to Ground the Light Fixture?
The ground wire serves as a safety net. When a short circuit occurs, ground wire signals the breaker to stop the flow of electricity. To add a ground wire to the ceiling light, here are 13 steps to follow:
- Turn off the main power supply.
- Loosen the thumbscrews around the base of the screw.
- Unscrew the light bulb.
- Locate the mounting screws at the base of the fixture. Unscrew them and lower the bottom of the fixture to expose the wiring from the ceiling.
- Untwist and pull the connected wires apart, release the fixture, and put it aside.
- Remove the metal mounting strap to expose the electrical box ( the strap accommodates the different sizes of mounting holes for various configurations.
- Locate the green screw. It is also the ground screw.
- Attach the screw to one of the mounting holes in the electrical box.
- Cut a 6- 8 inch gauge of a copper wire. Wrap around and fasten it around the grounding screw.
- Attach the strap with a green screw with the electrical box.
- Wrap the bare ground wire attached to the electrical box. Wrap the bare wire from the ceiling light around the same screw. Tighten the screw on the strap.
- Hold the fixture base against the ceiling and fasten the fixture mounting screws to the strap.
- Install the light bulb and place the breaker back on.
Read more: Best Step Ladder for Elderly – Buyer’s Guide
Conclusion
The ground wire is easy to install and barely requires any professional assistance. Locating the ground wire is easy, especially in modern electrical panels and fixtures; as per NEC’s safety standards, it is necessary to have ground wires with all electrical fixtures in modern houses.


