Different Ways for How to Soften Plumber’s Putty
I acquired my plumber’s putty some time back, I used it like two times and kept it aside, seeing as I did not need it. It turns out my kitchen sink started to leak, and I needed to seal it again with the plumber’s putty to stop the leaks.
Lo! And behold!, my plumber’s putty was as hard as anything, and I couldn’t make use of it until I did a whole lot of research on how to soften plumber’s putty.
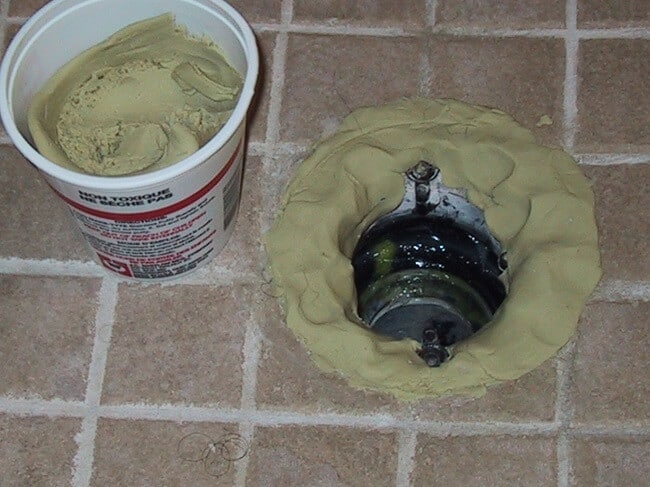
Plumber’s putty is a clay-like substance used to make a 100% watertight seal in situations where waterproof sealing becomes necessary for preventing leaks.
In this tutorial, you will get the 3 simple ways you can employ in softening your plumber’s putty instead of throwing it out and getting another one.
#1. How to Soften Plumber’s Putty Using Water and Hand Lotion
Using this method is very convenient as everything you would need is right in your home. You don’t need to go out to get oil or hair gel like the other methods I mentioned.
I would recommend this method for those who can calm their nerves, i.e. being patient. I happen not to be on that list because it happens to be very time-consuming.
Step 1: Lay your plumber’s putty on a flat surface like a table after removing it from the container.
Step 2: Mix 1-2 US tbsp, i.e. 15-30 ml of water into your plumber’s putty.
Step 3: Mold and knead your plumber’s putty using well-gloved fingers until it is pliable.
Step 4: Pour in a squirt of any hand lotion into your plumber’s putty and remould.
Step 5: If the putty remains hard, soak it overnight with lukewarm water on top of it after putting it back in its container or any other container.
Step 6: Fill a large bowl with hot water after the overnight treatment. Place your plumber’s putty in it. Squeeze and fold it with your gloved hands until it is soft and you can easily shape it.
Additional note: If you are making use of a store-bought plumber’s putty, you should check the label. This checking of the label is to be sure you can add water or any other ingredients in it before using this method.
Read more: How Long Does Plumbers Putty Take To Dry?
#2. How to Soften Plumber’s Putty Using Hair Gel and Microwave
This method is also very efficient, but it happens to be time-consuming as well.
It involves the use of a microwave so you might want to consider other options if you don’t have a microwave at home.
Step 1: Mix several spoonfuls of hair gel into your putty to constitute a slime texture.
Step 2: Place the slimy plumber’s putty into a microwavable bowl then add 1-2 US tbsp, i.e. 15-30 ml of hair gel into the bowl.
Step 3: Knead the hair gel together with the putty very well over and over again.
Step 4: Place the bowl containing the plumber’s putty into the microwave, heat at a standard temperature for like 2 minutes and allow cooling.
Step 5: Continue repeating the cycle of adding hair gel, kneading and microwaving for 2 minutes standard temperature until you get the consistency you need.
Read more: Best Putty Knives Reviews You Should Have in The Toolbox
#3. How to Soften Plumber’s Putty Using Spray Oil
This method is efficient and also very quick. In case you are wondering, this is the method I chose when I thought there was no hope for my precious plumber’s putty.
I almost gave up on the whole idea after seeing that so many methods like those I earlier recommended would take up so much time.
So this is the method for you if you happen to be an impatient person like I am.
Step 1: Remove the plumber’s putty from the container using a putty knife. You can make use of anything that can do the job in case you don’t have a putty knife.
Step 2: Place the plumber’s putty on a flat surface, like a table or something.
Step 3: Knead the plumber’s putty using your hand with a glove on.
Step 4: Place it on the flat surface and spray it with oil. I prefer Pam No-stick cooking spray, but you can make use of any oil you have, be it linseed oil or any other alternative.
Step 5: Knead the plumber’s putty again and spray it with oil.
Step 6: Keep alternating the process until you get the texture you want.
Read more: Window Glazing Putty Vs. Caulk – What Is the Difference And Which Is Better?
The Best Plumber’s Putty You Just Have to Get
There is so many plumber’s putty in the market now, and it takes only experts to know which of them to acquire.
Before we go on to softening your plumber’s putty, I would like to share with you some plumber’s putty I believe would be worth your while.
I have obtained this after extensive research, of course, so you have to give it a try and with no stress on your part too.
#1. Oatey 25103 Plumbers Putty Hercules Sta Put
Majority of plumbers prefer to use this plumber’s putty because of its flexibility, easy moulding, and stretchability. Personally, it appeals to me because of the brand name,” Oatey”.
It has been in the market for a while; hence many plumbers use it for their plumbing jobs. I would not recommend you use it for granite, marble, quartz or sandstone, for a plumber’s putty that can go for that, the next plumber’s putty would be the right choice.
#2. Oatey 31177 Plumbers Putty
This product is straightforward to use due to its flexibility, easy moulding, and easy handling.
Unlike the first one I mentioned, you can use this for your granite, marble, or even stone; this is because of the absence of oil, which makes it a no-stain quality.
However, it would be best if you did not use it on pipes. For pipes, I recommend the next plumber’s putty.
#3. Oatey 25171 Sta-Put Ultra Plumbers Putty
To use this brand, ensure it is what you need. It would be best if you only use this plumber’s putty with plastic, rubber or fibreglass. So have this in mind when getting it.
#4. GE GE284 Silicone II 2.8oz Clear Premium Waterproof
This is great for your plastic pipes and every fitting made with plastic. It can be an alternative for the one I mentioned before this. I would go with this one as it is an excellent fit for sealing any plumbing clash and drain as well as its waterproof quality.
#5. Black Swan 45377
For your toilet bowls, faucets, strainers, and countless other applications, this is a go-to plumber’s putty.
I made use of this with my kitchen sink due to its gas, water and odour resistant nature. It would help if you tried it out.
Read more: How Long to Let PVC Glue Dry before Turning on Water
Conclusion
Discovering that I no longer have to consider other alternatives in sealing my fixtures at home is terrific. I hope you feel the same way, and I hope I have been able to help you out in using your putty as well as putting an end to embarrassing leaks that arise due to its usage.
Anyways I would like to learn from you; what do you use your plumber’s putty for and how often do you use it? What alternatives appeal to you instead of the plumber’s putty? Which of the methods in this tutorial appealed to you and why? Did you find this tutorial helpful?
Do well to give your thoughts in the comment section. I would love the feedback, and please share to others as that is the main aim of the tutorial (helping out as many people as possible).

